Anyone who has spent time around horses knows that injuries are not a matter of if but when. Horses are large, curious, powerful animals who share their world with barbed wire, gate latches, sharp branches, and other horses' teeth. Over 45 years of working with horses, I have treated everything from tiny scrapes that barely broke the skin to deep lacerations that required emergency veterinary intervention and weeks of careful aftercare.
What I have learned through all of those experiences is that the first few minutes after discovering a wound can shape the entire healing journey. A calm, knowledgeable response prevents panic, reduces the risk of infection, and gives your horse the best possible chance of a full recovery. This guide brings together the practical, hands-on knowledge I wish someone had handed me when I first started — alongside the veterinary science that underpins every recommendation.
Understanding the Different Types of Horse Wounds
Before you can treat a wound effectively, you need to understand what you are looking at. Not all injuries are created equal, and the type of wound determines everything from the cleaning approach to whether you need a vet on-site within the hour.
Cuts and lacerations are the most common injuries I encounter. They are usually caused by fencing, metal edges on gates, or sharp objects hidden in the paddock. A clean cut from a piece of sheet metal looks very different from a jagged tear caused by barbed wire, and the jagged variety is almost always more prone to infection because the torn tissue creates pockets where bacteria can thrive.
Abrasions and scrapes tend to be superficial, caused by friction against rough surfaces such as arena fencing, stable walls, or the ground during a roll. They look alarming because they often cover a large area and weep fluid, but they are generally the least serious category of wound.
Puncture wounds are the ones that worry me most. A nail, a thorn, a splinter of wood — the entry point can be surprisingly small, which makes puncture wounds easy to miss entirely. The real danger lies beneath the surface. A puncture can drive bacteria deep into tissue, and because the small opening tends to close over quickly, it can seal infection inside.
Contusions and bruises result from blunt force — a kick from another horse, a collision with a solid object, or a fall. You may not see broken skin at all, but the swelling, heat, and tenderness tell you that blood vessels and soft tissue underneath have been damaged. Cold hosing in the first 24 hours can make a significant difference.
Sprains and strains affect ligaments, tendons, and muscles rather than the skin itself. They typically show up as lameness, localised swelling, and reluctance to bear weight. While they are not "wounds" in the traditional sense, they often accompany other injuries and require their own careful management.
How to Assess the Severity of a Wound
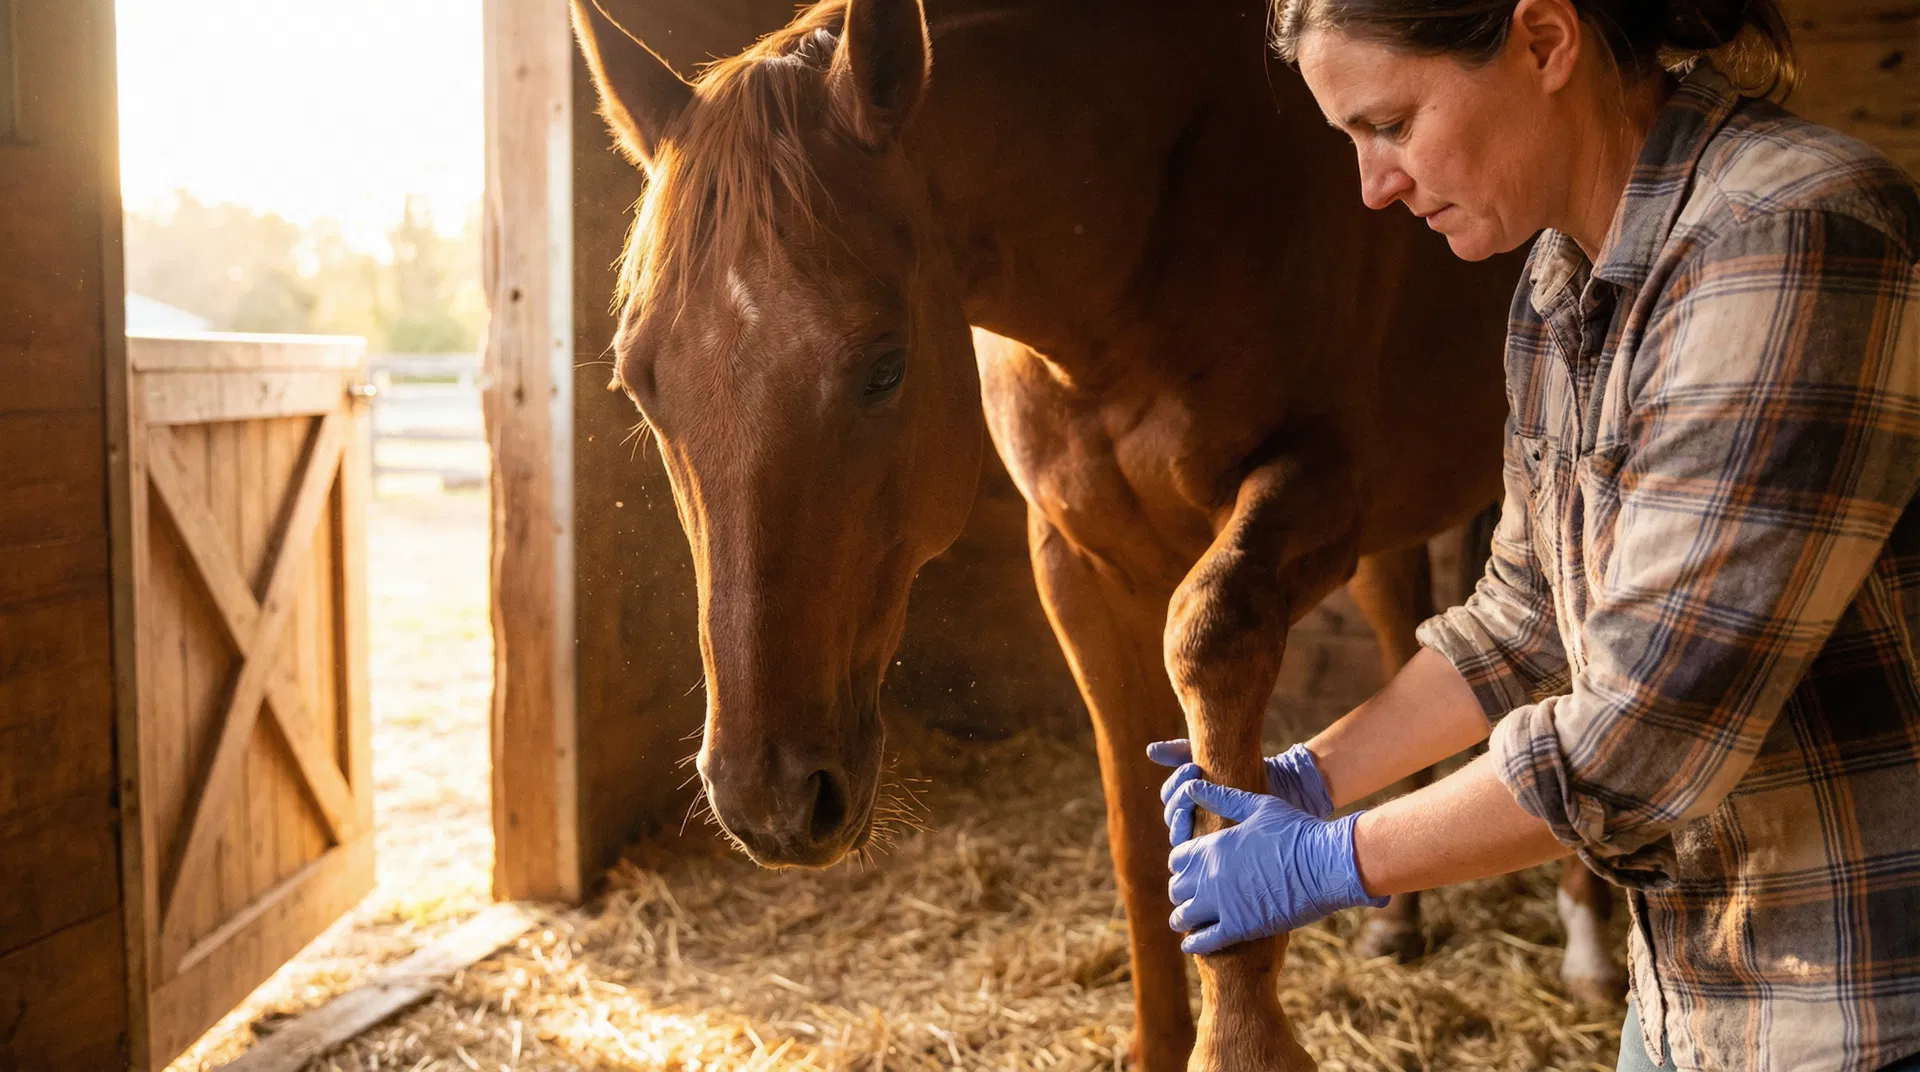
The moment you discover a wound on your horse, take a breath. Your horse will read your energy, and a calm handler makes for a calmer patient. Then work through a systematic assessment.
Look at the depth. Can you see muscle, tendon, or bone? If so, this is a veterinary emergency. Even if the wound looks deep but you cannot see underlying structures, err on the side of caution.
Consider the location. Wounds over joints are always more serious than wounds on flat areas of the body, because there is a risk that the joint capsule has been penetrated. Synovial fluid leaking from a wound is a clear, slightly sticky liquid — if you see anything like that, call your vet immediately.
Evaluate the bleeding. Steady, dark red blood is venous and usually controllable with direct pressure. Bright red blood that pulses with the heartbeat is arterial and requires urgent veterinary attention.
Check for foreign objects. If you can see a nail, splinter, or piece of wire in the wound, resist the urge to pull it out unless it is sitting loosely on the surface. Deeply embedded objects can be plugging a blood vessel.
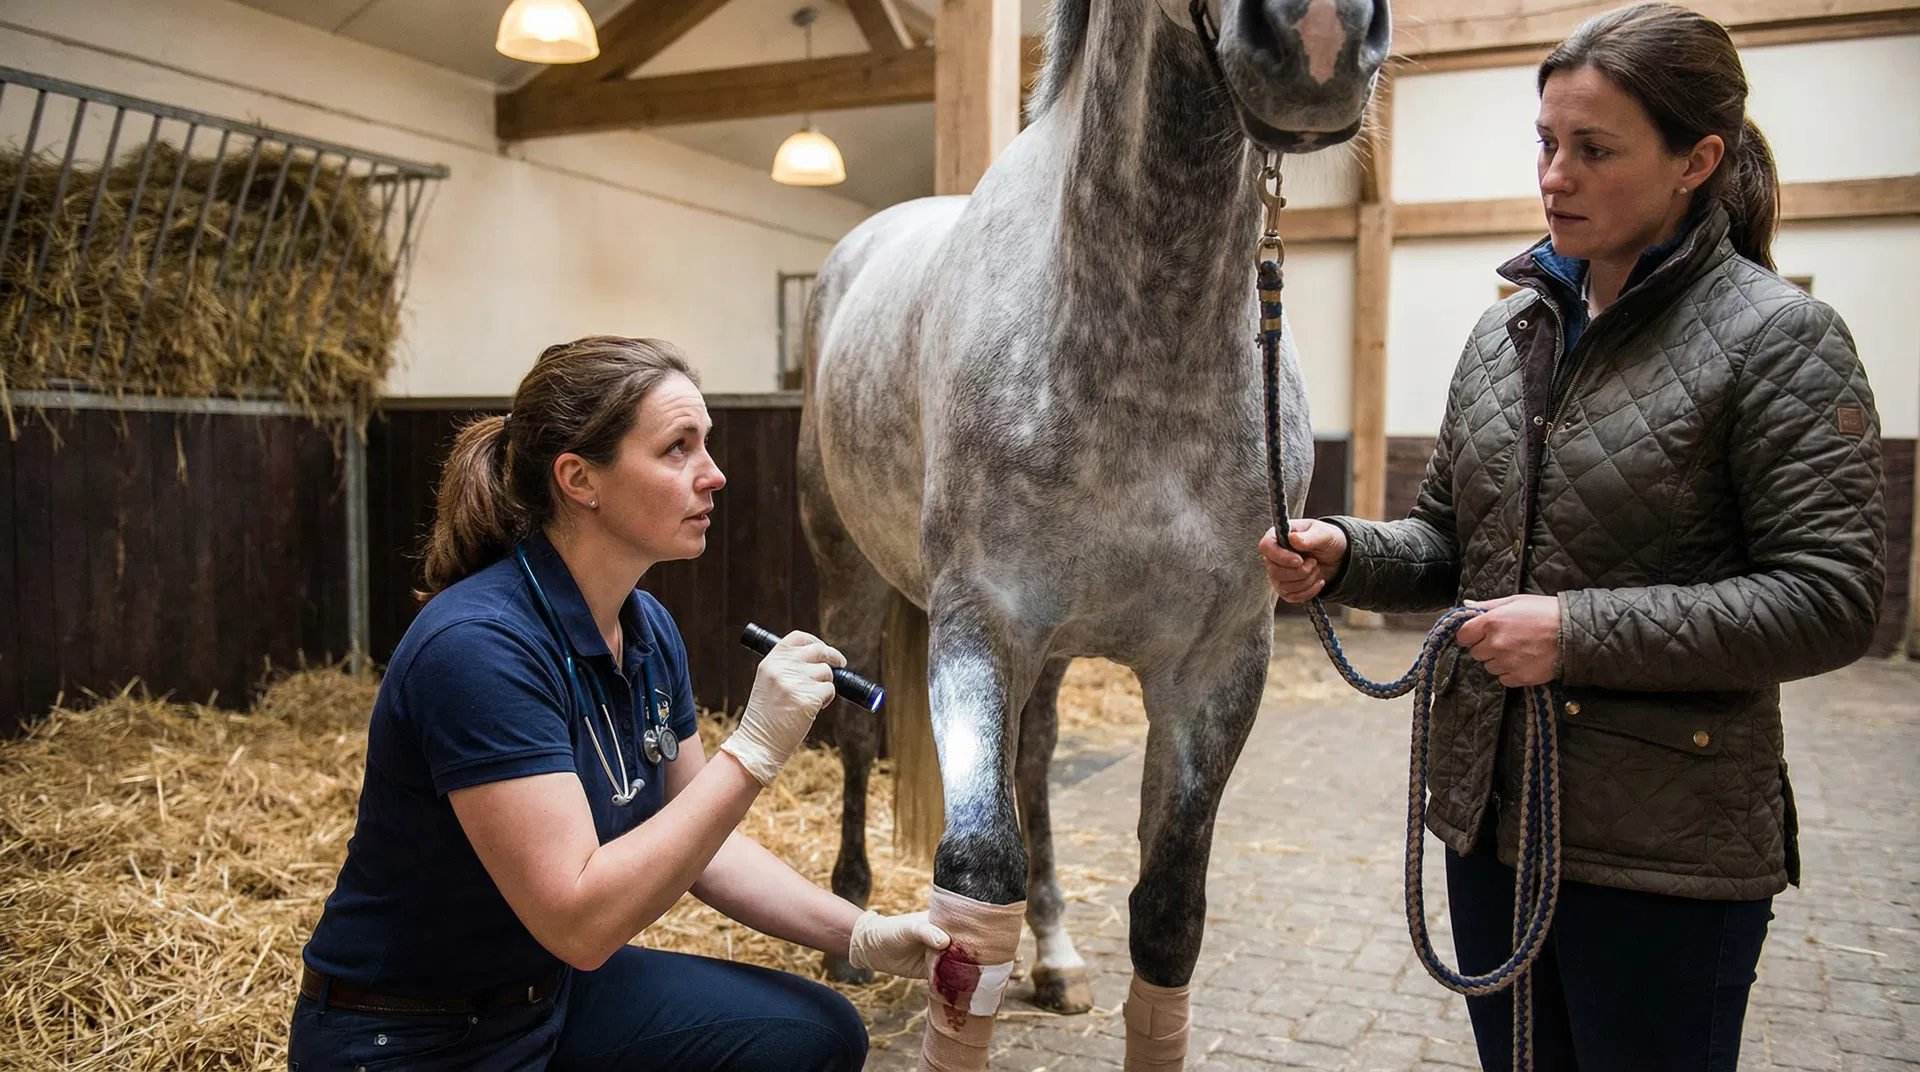
When to Call the Vet — No Hesitation
| Situation | Why It Matters |
|---|---|
| Wound is deep enough to see muscle or bone | Risk of structural damage; may need suturing |
| Wound is near or over a joint | Possible joint capsule penetration |
| Bleeding cannot be controlled with pressure | Possible arterial damage |
| Foreign object is deeply embedded | Removal requires sedation and veterinary skill |
| Puncture wound on the sole of the hoof | Risk of deep infection affecting internal structures |
| Eye injury of any kind | Eyes are delicate; even minor injuries can worsen rapidly |
| Horse shows signs of shock | Systemic emergency requiring IV fluids and medication |
| Wound is more than 6 hours old and gaping | Suturing window may be closing; vet needs to decide |
| Any wound you are unsure about | It is always better to call and be told it is minor |
Your Equine First Aid Kit
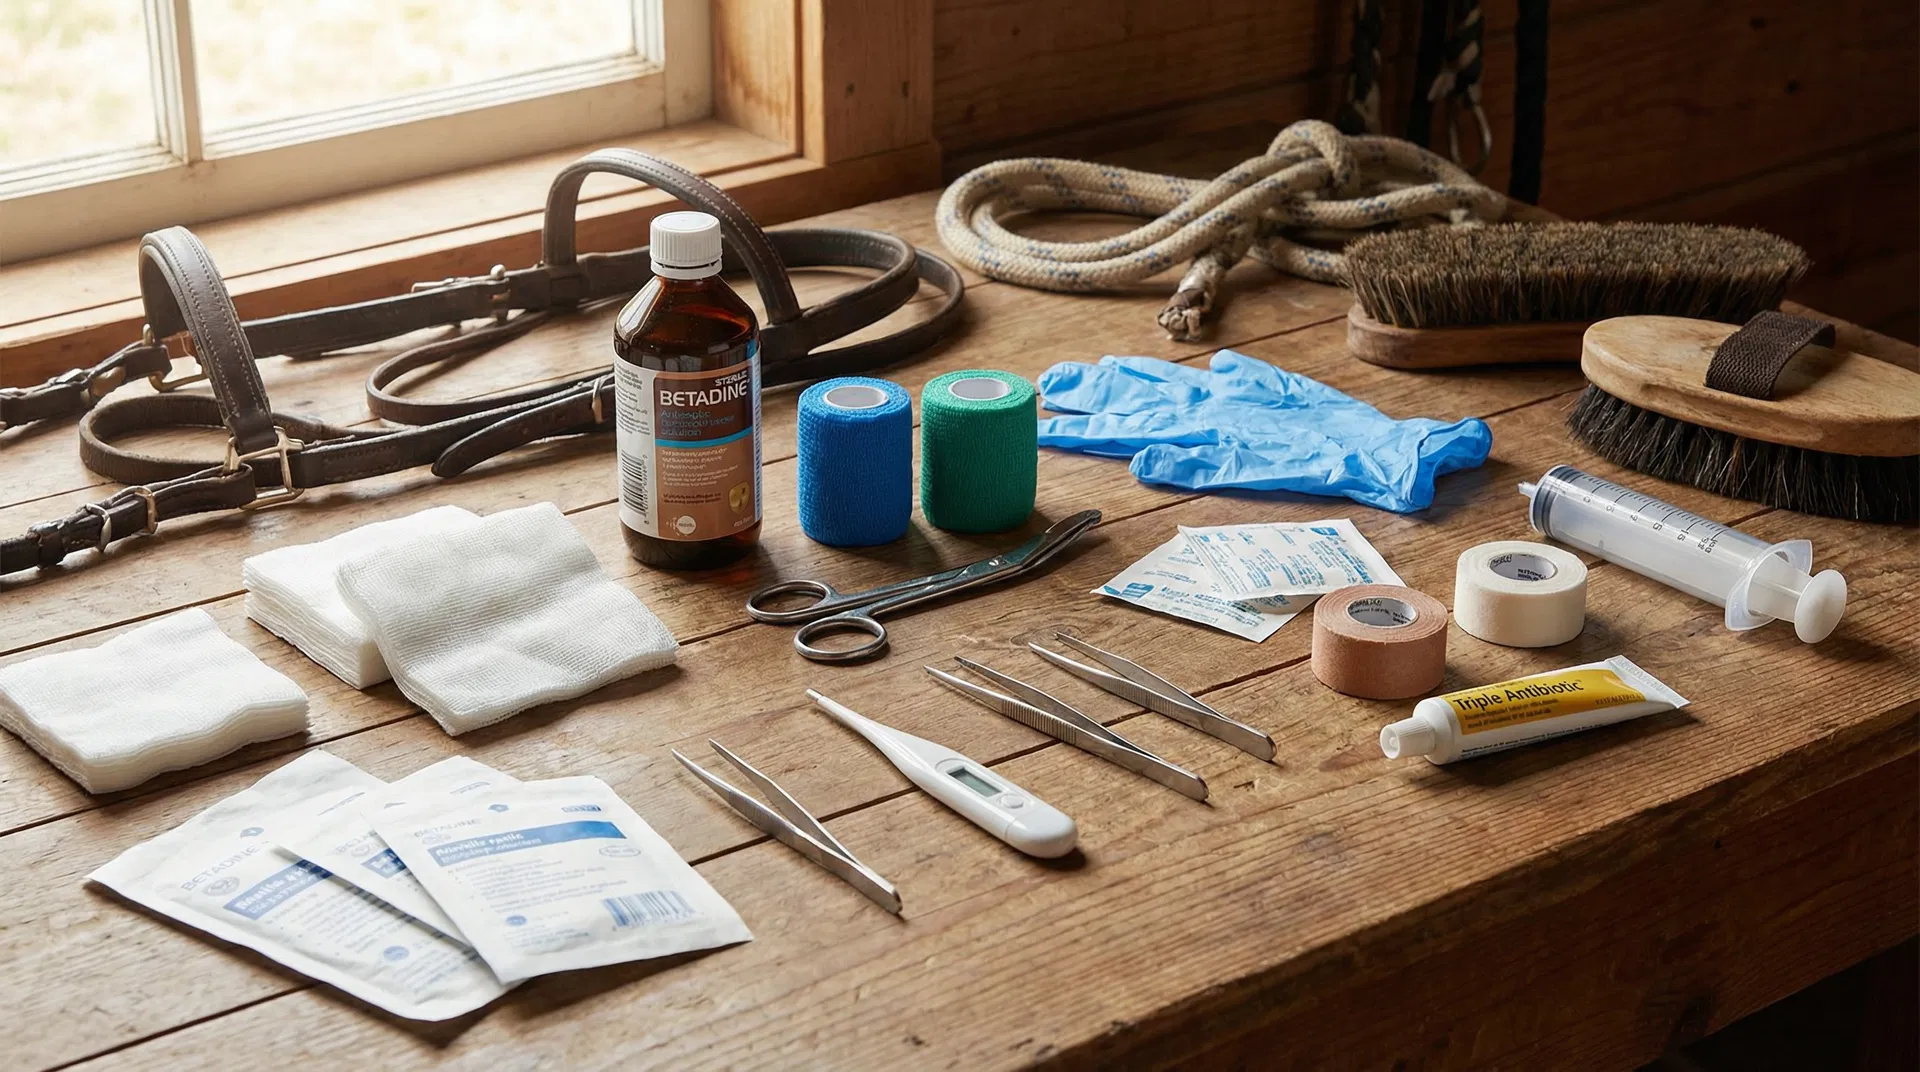
A well-stocked first aid kit is something you prepare before you need it. I keep one in the tack room and a smaller version in the horse trailer. Here is what should be in yours:
| Item | Purpose | Practical Tip |
|---|---|---|
| Sterile gauze pads | Cleaning and covering wounds | Buy in bulk — you will use more than you expect |
| Sterile saline solution | Flushing wounds gently | A large syringe (without needle) gives good flushing pressure |
| Veterinary antiseptic | Disinfecting wound edges | Dilute according to vet instructions — stronger is not better |
| Non-stick dressings | Covering wounds without sticking | Essential for preventing painful dressing changes |
| Vet wrap | Securing dressings | Do not stretch it tight — let it stick to itself naturally |
| Cotton wool or gamgee | Cushioning under bandages | Always use a padding layer between wound and vet wrap |
| Curved bandage scissors | Cutting dressings safely | Rounded tips prevent accidentally cutting the horse |
| Disposable gloves | Protecting you and the wound | Nitrile gloves are more durable than latex |
| Digital thermometer | Monitoring for fever | Normal range: 37.5–38.5°C (99.5–101.3°F) |
| Topical antibiotic cream | Preventing wound infection | Check the expiry date every six months |
| Your vet's phone number | Emergency contact | Tape it to the inside of the kit lid |
Free Download
Equine First Aid Checklist
Get a printable, fridge-ready checklist of everything covered in this guide — wound types, when to call the vet, first aid kit essentials, and the step-by-step cleaning process.
Get the Free ChecklistSubscribe to download — no spam, ever.
Step-by-Step Wound Cleaning
Once you have assessed the wound and determined that it is something you can manage, proper cleaning is your most important task. The goal is to remove contamination without causing further damage to the tissue.
Secure your horse
Have someone hold your horse, or tie them safely with a quick-release knot. Position yourself where you can move away quickly if needed.
Put on gloves
This protects the wound from bacteria on your hands and protects you from any pathogens in the horse's blood.
Assess before you touch
Note the size, depth, location, and whether there is active bleeding. If bleeding is significant, apply direct pressure first.
Flush generously with saline
Use a 60ml syringe to direct a steady stream into the wound. I typically use at least 500ml of saline for a moderate wound.
Gently clean the surrounding skin
Work outward from the wound edges with dilute antiseptic on gauze to avoid pushing dirt back in.
Pat dry gently
Use sterile gauze to pat the wound dry. Do not rub — rubbing damages fragile new tissue.
Apply topical treatment
A thin layer of veterinary antibiotic ointment is usually appropriate for fresh, clean wounds.
Bandaging: When, Why, and How
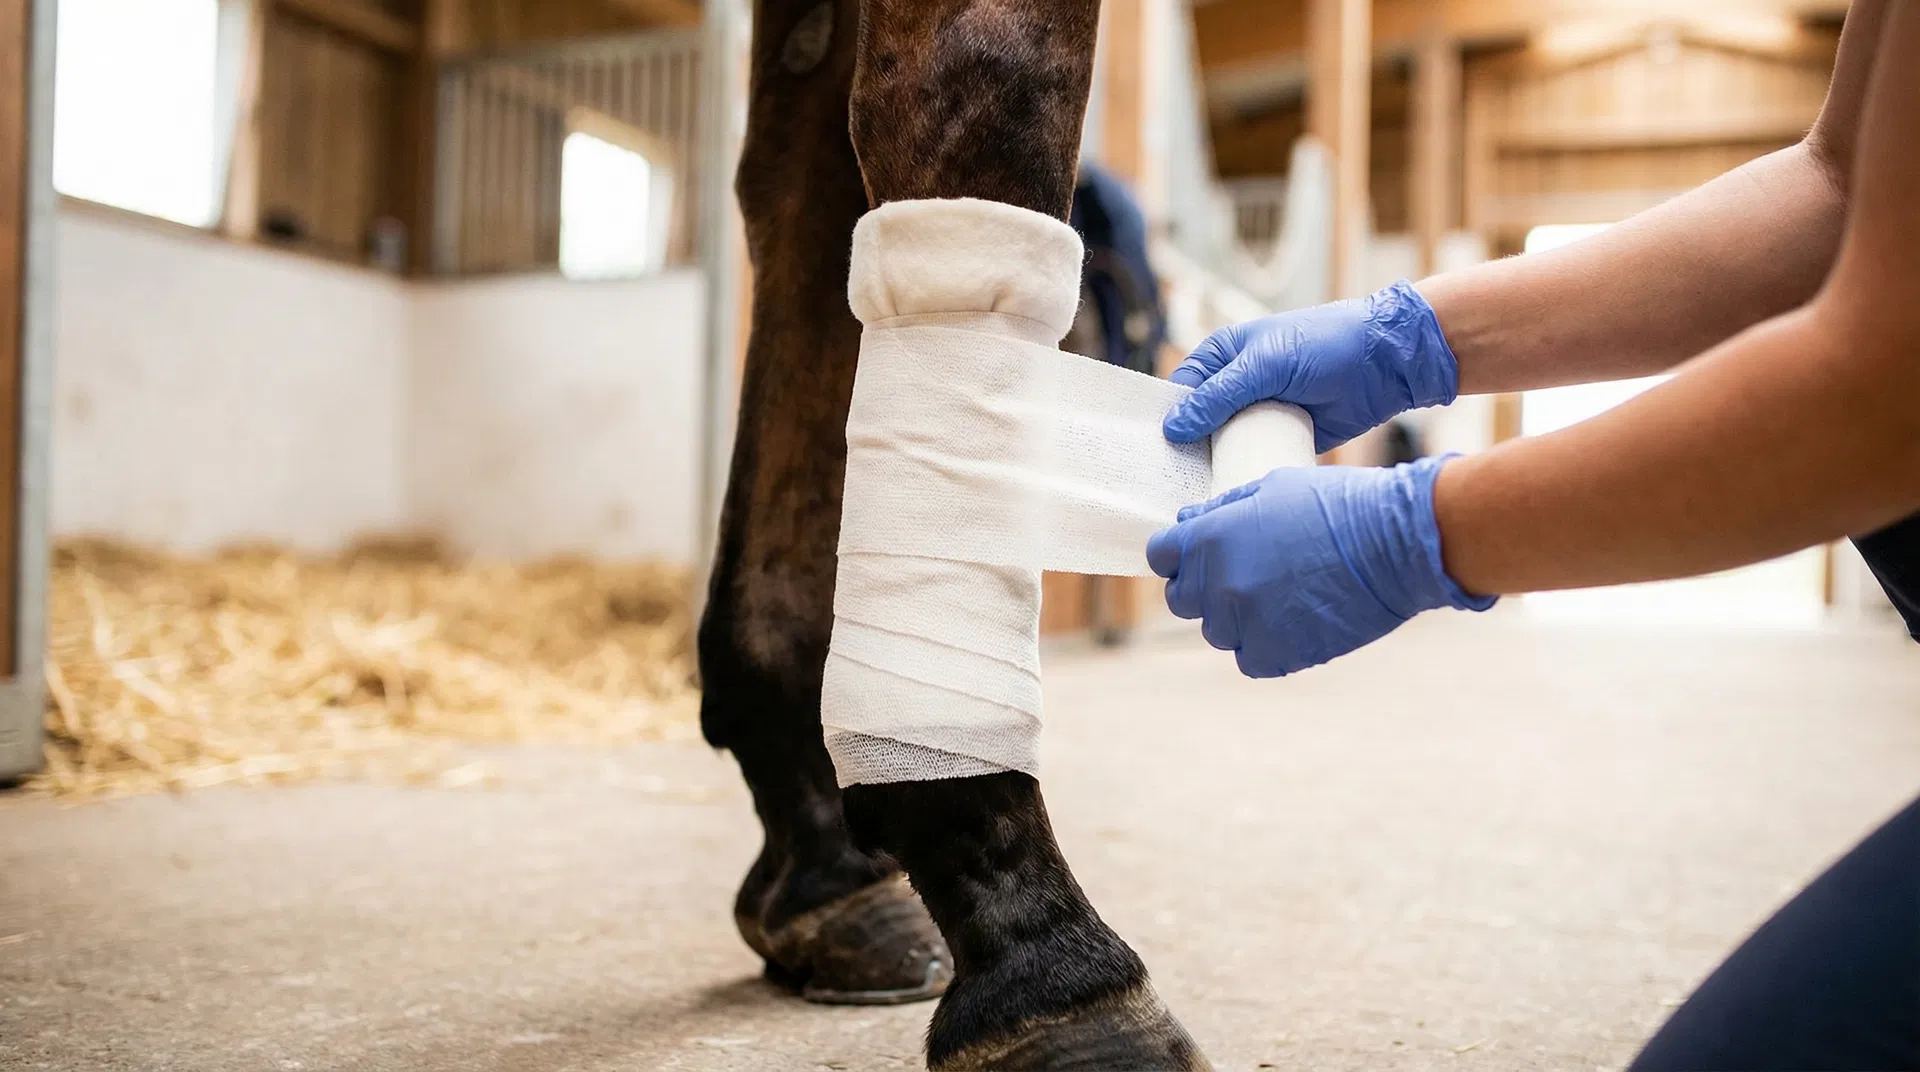
Not every wound needs a bandage. Small, superficial scrapes on the body often heal better when left open to the air. However, wounds on the lower legs almost always benefit from bandaging because the area is prone to contamination, swelling, and proud flesh.
The layering principle is essential. A proper equine bandage has three layers. The primary layer sits directly against the wound — this must be a non-stick dressing. The secondary layer provides padding and absorbs fluid using gamgee tissue or cotton wool. The outer layer holds everything in place with vet wrap, applied firmly but not so tightly that it restricts circulation.
Check the bandage twice daily for slipping, swelling above or below, heat, odour, or increased discomfort. Change the dressing as your vet advises — daily in the early stages, extending to every two or three days as the wound progresses.
Recognising and Preventing Infection
Infection is the single biggest threat to wound healing, and catching it early makes an enormous difference to the outcome. Here are the signs to watch for:
Increased swelling & heat
After the first 48 hours, worsening swelling signals infection
Changes in discharge
Thick, cloudy, green, or foul-smelling discharge is a red flag
Spreading redness
Angry red streaks radiating from the wound edges
Fever above 38.5°C
Combined with other signs, call your vet immediately
Behavioural changes
Dullness, going off feed, or increased pain
Delayed healing
No improvement after two weeks of proper care
To prevent infection, keep the wound clean, change dressings regularly, ensure the horse's environment is as clean as possible, and control flies aggressively during warmer months. Fly masks, fly sheets, and topical repellents are all part of your wound management toolkit during summer.
The Proud Flesh Problem
Proud flesh — or exuberant granulation tissue — is one of the most common complications of lower leg wounds in horses. It occurs when the body produces too much of the pink, bumpy tissue that normally fills a wound during healing. Instead of the skin growing across the wound to close it, the granulation tissue grows above the level of the surrounding skin, creating a raised, raw mass that bleeds easily and prevents the wound from closing.
Horses are particularly prone to proud flesh on the lower legs because the blood supply is strong but the skin is tight, and there is constant movement of the underlying tendons and joints. If you notice the wound tissue rising above the level of the skin edges, contact your vet.
Monitoring the Healing Journey
Wound healing in horses is not a straight line. There will be days when the wound looks markedly better and days when it seems to have taken a step backward. This is normal, and patience is essential.
Keep a simple healing journal. Each time you change the dressing, note the date, the size of the wound (a quick photo on your phone is even better), the colour and amount of any discharge, and how the horse is behaving. Over the course of a week, these notes will reveal the overall trend far more reliably than any single observation.
Healing Well
- Gradual reduction in wound size
- Healthy pink granulation tissue
- Decreasing discharge
- New skin growing from wound edges
- Horse comfortable and behaving normally
Something May Be Wrong
- Wound not shrinking after two weeks
- Increasing or changing discharge
- Proud flesh above skin level
- Horse becoming more lame or painful
- Any infection signs described above
Do not hesitate to send your vet a photo if you are unsure whether the wound is progressing as it should. Most equine vets are happy to review a photo and advise whether an in-person visit is needed.
Special Considerations by Body Part
Different areas of the horse's body present different challenges for wound management.
Lower Legs
The most demanding wounds. Poor blood supply, constant movement, proximity to the ground, and the tendency toward proud flesh. Almost always need bandaging; healing measured in weeks or months.
Near Joints
Require immediate veterinary assessment. If the joint capsule has been penetrated, the horse needs aggressive treatment — often including joint lavage and intravenous antibiotics.
Face & Head
Tend to bleed dramatically due to excellent blood supply, but this also promotes rapid healing. The challenge is keeping dressings in place. Fly masks can help hold forehead dressings.
Hoof & Sole
A puncture to the sole can reach the coffin bone or navicular bursa. If your horse steps on a nail, do not pull it out — call your vet for X-ray with the nail in place.
Body (Barrel, Shoulder)
Generally heal well due to good blood supply and plenty of soft tissue. Often manageable at home, provided they are not deep enough to require suturing.
Building Your Confidence
Wound care is a skill that improves with practice, and every horse owner should invest time in learning the basics before an emergency forces them to learn on the fly. Consider attending an equine first aid course — many veterinary practices and equestrian organisations offer them. Practice bandaging on a calm, healthy horse so that the technique feels natural when you need it under pressure.
Most importantly, build a relationship with your vet. A vet who knows you and your horses can give better advice over the phone, is more likely to talk you through a situation calmly, and will know when something genuinely needs their hands-on attention versus when you can manage at home with guidance.
Wound care is not glamorous, and it is rarely convenient. But there is a deep satisfaction in watching a wound you have carefully tended close over and heal, knowing that your knowledge and dedication made the difference. That is what being a horse person is all about.
Enjoyed this guide?
Have you dealt with a tricky wound on your horse? I would love to hear your experiences — drop me a message or connect on Pinterest.
Jenni B
Horse lover, artist, and founder of 4theloveof-horses.com. With over 45 years of equine experience, Jenni shares practical knowledge to help horse owners provide the best care for their companions.